Endpoint Detail
Overview
Endpoint Detail is the page that handles all settings for a single endpoint. From this one screen you can:
- View and edit endpoint info (name, description, URL, version)
- Toggle active / inactive
- Deploy and redeploy to production
- Manage default API key
- Add and remove required fields
- Configure webhooks and system notifications
- Delete the endpoint
Collaboration key management (issuing keys, invitations, permissions) is handled on a separate page. See Collaboration Keys for details.
If you're participating as a collaborator, only the sections you have access to are shown (owner-only sections are automatically hidden).
How to get here
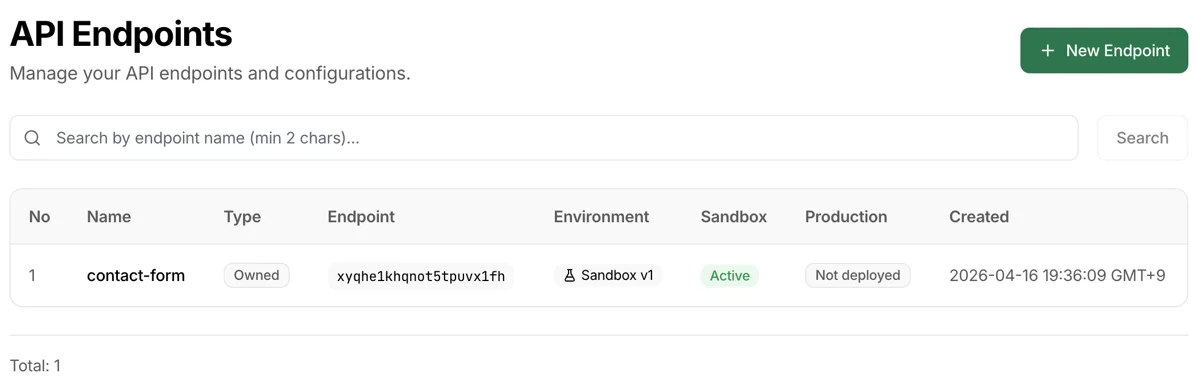
- Top menu APIs → Click the endpoint name in the list
- Dashboard Recent Activity → Click the endpoint
- Auto-navigated after completing Onboarding Step 1
Free plan warning banner

Shown at the top when using the Free plan. On the Free plan, feel free to create and experiment with endpoints as much as you like. They are automatically cleaned up 7 days after creation, but you can always create new ones — so go ahead and try things out.
Active/Inactive and Deploy buttons

Owner-only area.
- Active/Inactive button (Power icon): Use this when you want to temporarily pause API calls across all environments. Calls are rejected while inactive, but data is preserved.
Deploy to Productionbutton (Sandbox tab only):- Copies the current sandbox settings to production
- Condition: Must have completed at least 1 test call in sandbox before it becomes active
If a collaborator is accessing the page, a Request Deploy button appears instead. It sends a deployment request message to the owner.
Environment tabs

Below the header bar, there are Sandbox | Production tabs. The two environments are completely independent.
The recommended workflow is: Test in sandbox and discuss with collaborators → Deploy to production → Operate. When changes are needed, modify in sandbox first and redeploy.
Sandbox
- Environment for calls with sandbox API keys (
tm_test_) - For testing only. Experiment freely before going live
- Sandbox data is automatically deleted after 30 days (all plans)
Production
- Environment for calls with production API keys (
tm_live_) - For live operations. Data is permanently retained while your account is active. Records older than 30 days are automatically archived (paid plans)
- Before production deployment, production key calls are rejected and not logged
Overview card
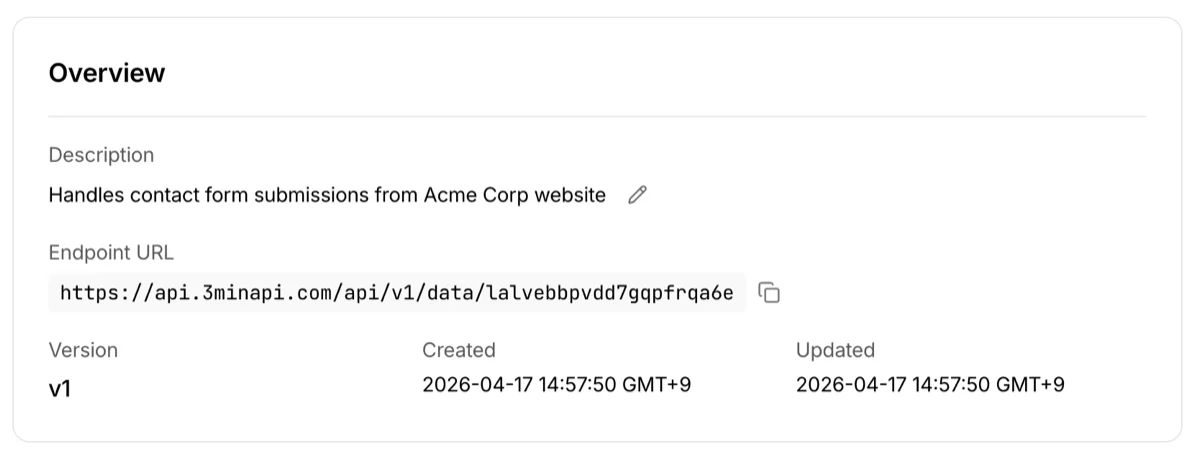
Section containing the endpoint's basic information.
| Item | Description |
|---|---|
| Description | Endpoint description. Owner can edit inline on the Sandbox tab |
| Endpoint URL | The actual API call address. Send POST/GET/PUT/DELETE requests to this URL. Copy button provided |
| Version | Configuration version. Increments with each deployment |
| Created | Endpoint creation time |
| Updated | Last setting change time (Sandbox) |
| Published | Production deployment time (Production tab only) |
Default API Key
Owner-only area.

- The default API key issued when the endpoint was created
- Used for authentication on the Test & Integration Guide page, accessed via the View Docs button on the right
- Show / Hide toggle to conceal or reveal the key on screen
- Regenerate button: The previous key is immediately invalidated. Use only when exposure is suspected
When a collaborator accesses the page, this section is replaced with their assigned collaboration key card.
Collaboration Keys
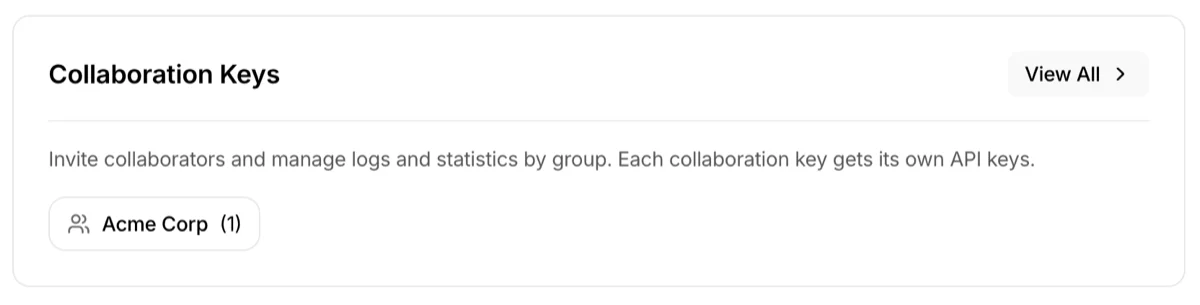
Only a summary card is provided here — key creation, invitations, and permission management are done on a separate management page.
- Owner view:
View allbutton and per-collaborator summary (name, invitation count) - Collaborator view: Permission badges for the key assigned to you
See Collaboration Keys for detailed instructions.
Required Fields
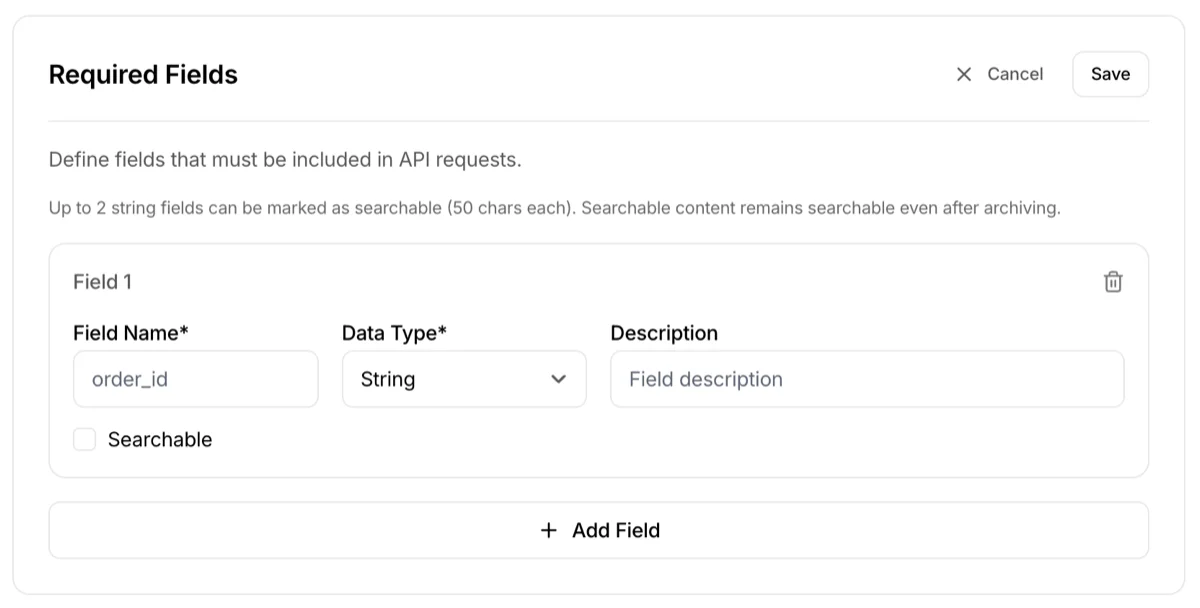
Define JSON fields that must be included in API calls. For a detailed explanation, see Create New Endpoint.
- To add or edit fields, click the
Editbutton - While editing, you can add, delete, and change field types. Finish with
SaveorCancel - Saving updates the Sandbox configuration — to apply to production, you need to redeploy
- Even after deployment, modifying required fields does not affect existing stored data. The updated field rules apply only to new incoming calls
Google Sheets
Owner-only area.
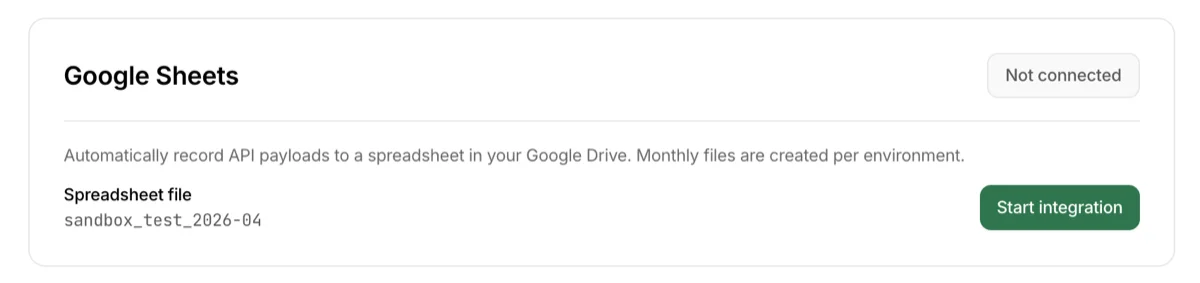
Automatically appends a row to a spreadsheet in your Google Drive on every API call.
- Operates independently per environment tab (Sandbox / Production each have their own settings)
- A new sheet file is created every month, and the header expands automatically when new fields appear
- Use the
`Send a test row`button to record a row immediately without writing any code
For details, see the Google Sheets guide.
Webhooks
Owner-only area.
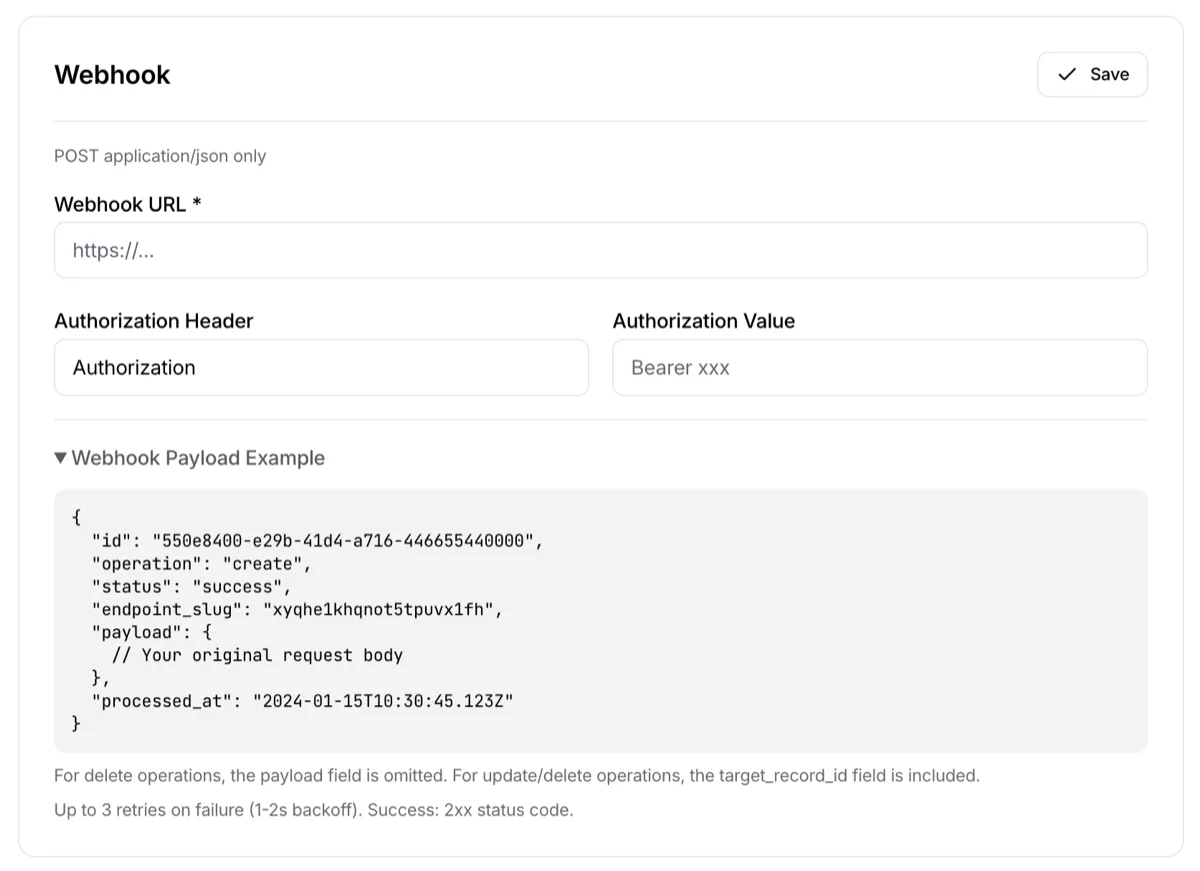
When an API call is successfully processed, a secondary request can be sent to the specified webhook URL. Data storage always completes regardless of webhook success.
Input fields
- Webhook URL: Address to receive webhooks (HTTPS recommended)
- Auth Header (optional): Authentication header key. Default
Authorization - Auth Value (optional): Authentication header value. Example:
Bearer abc123
For webhooks that don't require authentication (simple receivers, URL-embedded tokens, etc.), leave the auth fields empty.
Webhook policy summary
- Retry: Up to 3 retries on failure, 1s → 2s backoff
- Timeout: Must respond within 7 seconds. Treated as failure if exceeded
Webhook payload
When an API call is processed, the following JSON payload is sent to the webhook URL. You can view the actual format by expanding the Webhook Payload Example section in the screenshot.
| Field | Description |
|---|---|
| id | Unique ID of the stored record |
| operation | Action performed (create, update, delete) |
| status | Processing result (success, failed) |
| endpoint_slug | Endpoint identifier |
| payload | The original JSON data sent by the caller, included as-is (null for delete) |
| target_record_id | Target record ID (included for update/delete) |
| processed_at | Processing completion time |
Collaborator webhooks
If collaborators need webhooks, they can set their own by including X-Webhook-Callback and other headers in their API request. Collaborator webhooks operate independently from owner webhooks, and the payload format is identical. See Test & Integration Guide for detailed setup instructions.
Notifications
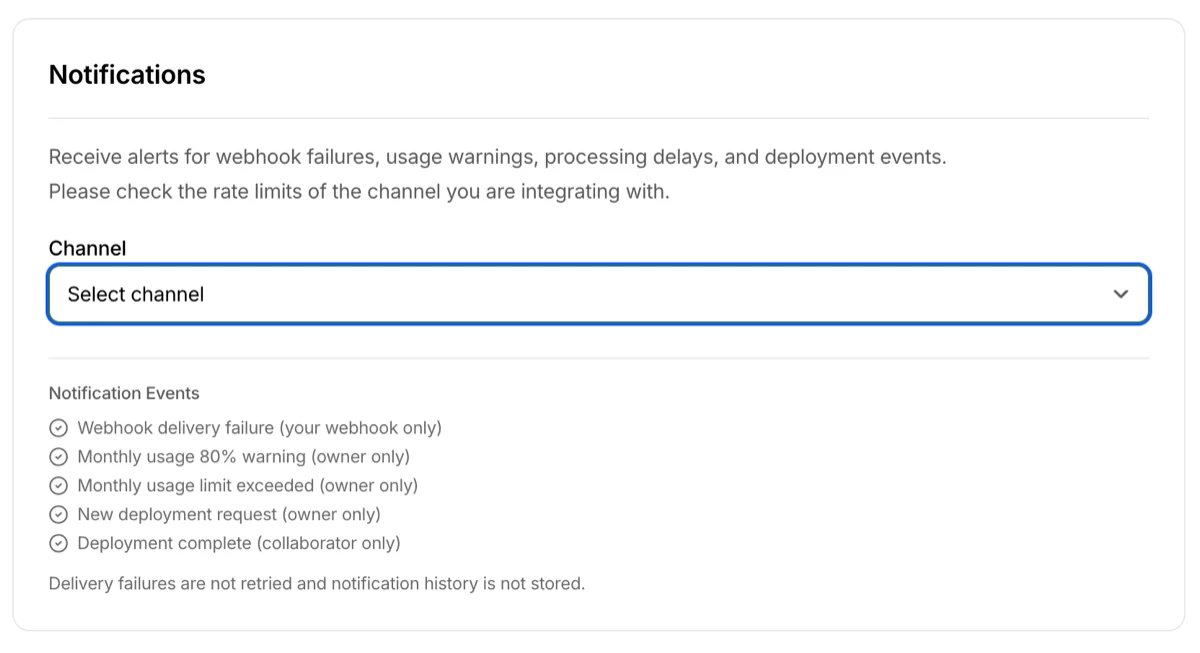
Separate from webhooks, this feature sends system events only to Discord, Slack, or Telegram. Request payloads are not included — only what event occurred is communicated.
Structure
- No environment tab separation: Notification settings are managed per endpoint, not per environment
- Owner view: Single notification settings card
- Collaborator view: Notification card shown per assigned collaboration key
Input fields
- Channel: Discord / Slack / Telegram
- Webhook URL: Bot/webhook URL pre-configured in each platform
- Chat ID: Required for Telegram only
Refer to each platform's official documentation for webhook/bot setup instructions.
Notification events
| Event | Recipient | Description |
|---|---|---|
| Webhook delivery failure (own webhook only) | Affected party | Owner webhook fails → owner / Collaborator webhook fails → collaborator |
| Sheet write failure (owner only) | Owner | Google Sheets auto-recording ultimately failed after automatic retries (per endpoint) |
| Google reauthentication required (owner only) | Owner | Sheet recording stopped because the Google account connection was lost (token expired, permission revoked, etc.) — account-wide |
| Monthly usage 80% warning (owner only) | Owner | Monthly usage reached 80% |
| Monthly usage limit exceeded (owner only) | Owner | Monthly usage exceeded 100% |
| New deployment request (owner only) | Owner | Collaborator requested production deployment |
| Deployment complete (collaborator only) | Collaborator | Owner completed deployment |
Note
- Notification delivery failures are not retried, and delivery history is not stored
- All notification messages are in English
Danger Zone
Owner-only area.

Delete Endpointbutton- Deletion immediately and permanently removes:
- The endpoint configuration itself
- All API records in sandbox and production
- Related statistics / deployment requests / webhooks / notification settings / collaboration keys / archive metadata
- Collaborators also lose access
- Cannot be undone — you must type the endpoint name in the confirmation dialog to proceed
Right sidebar
The right side of the detail page shows different quick cards depending on the environment.
API call records
Navigate to a page where you can view the results of API calls to this endpoint. You can check request success/failure, payloads, webhook status, and more in detail.
Sandbox test
Shown on the Sandbox tab.
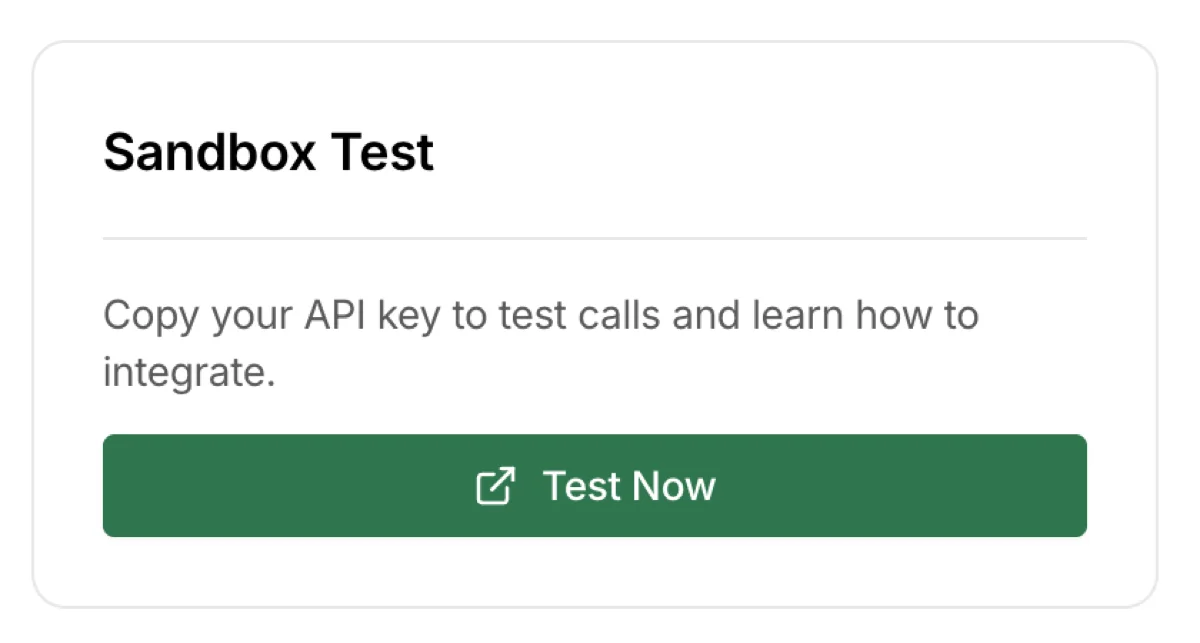
Navigate to a page where you can test API calls directly in the browser and check integration methods. See Test & Integration Guide for details.
Production console
Shown on the Production tab, after deployment, for the owner only.
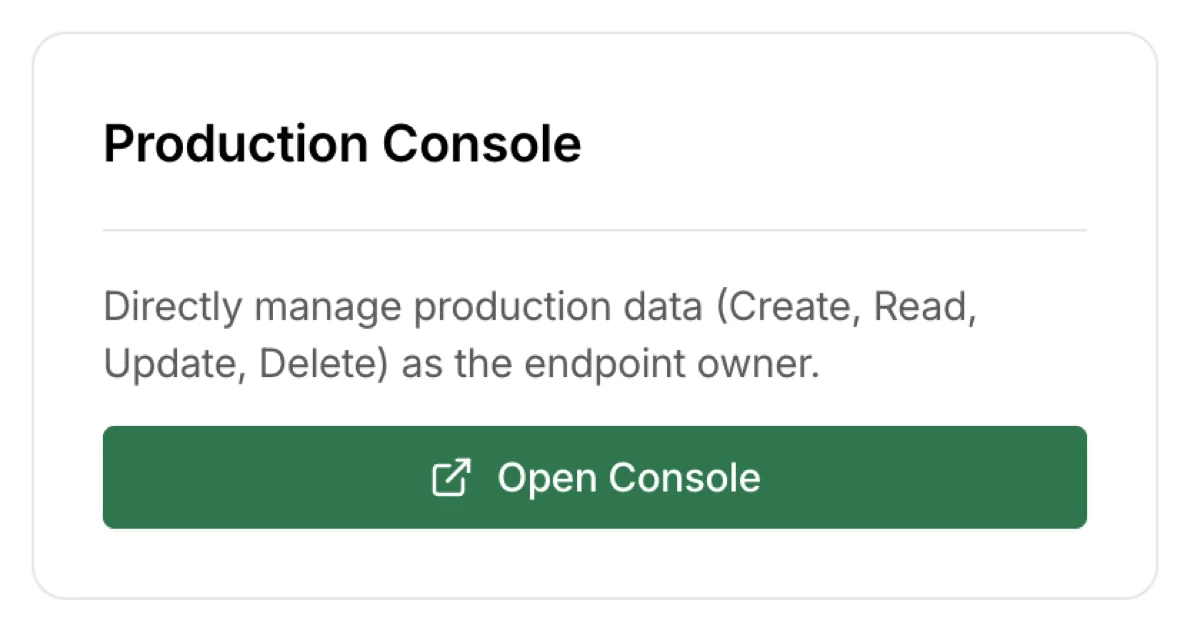
A console for managing production data directly from the dashboard. Useful for pre-populating product listings or announcements that collaborators will retrieve via GET. Supports POST (create), GET (read), PUT (update), and DELETE. The console runs with the owner's API key, and collaborator webhooks are not triggered. If the owner webhook is configured, it fires normally. See Production Console for details.
Deployment request notification
Shown on the Sandbox tab.
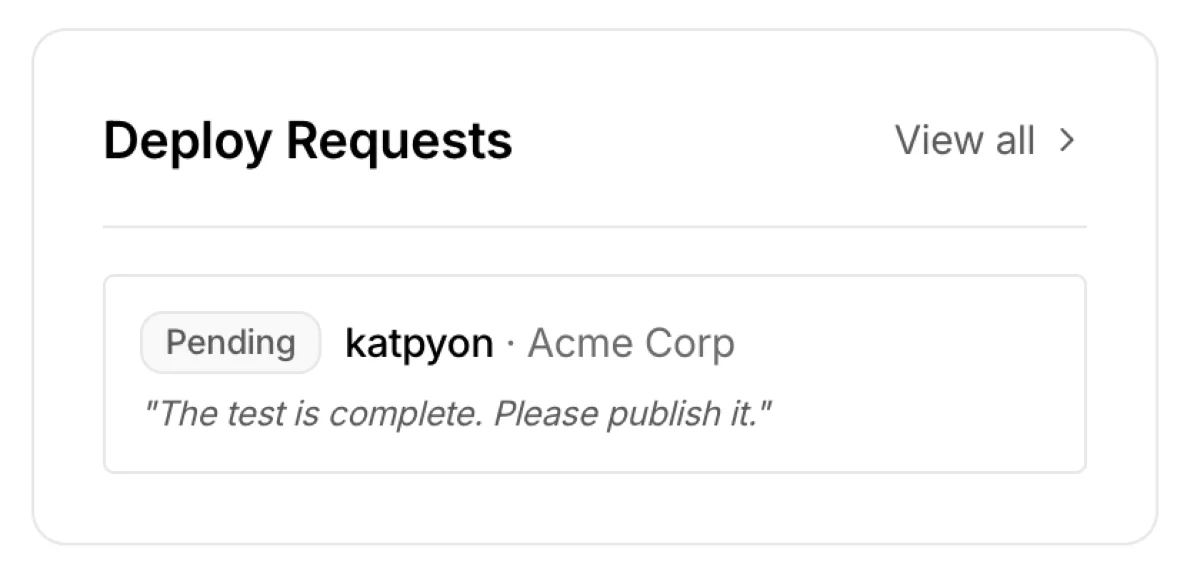
Shown when a collaborator has requested production deployment. This notification is also sent via email, so you won't miss it. Click the View all button to see the full deployment request history.
Troubleshooting
- Deploy button is disabled: Either no test calls have been made in sandbox, or the latest sandbox version is already deployed to production. Run a test in sandbox first
- Production tab has no records: Production calls are rejected until deployment, so no records are logged. Check if deployment was successful and whether
tm_live_keys are being used - Required fields changed but not reflected in production: Sandbox changes are not automatically applied to production. Click
Deploy to Productionagain - Webhook isn't arriving: Webhook servers must respond within 7 seconds. Check whether the server is publicly accessible and using HTTPS. Platforms like Discord and Slack have their own rate limits — if too many webhooks fire in a short time, some may be blocked. Check the receiving platform's rate limit policy as well